Create a Screenshot app with Screenshot API and React js

With the current situation going on in the world, the perfect situation came up to start learning React Js.
I've been learning React now for more than a month and as most of the newbies to a new language, I've entered the so-called Tutorial Hell
To get out of the Tutorial Hell had to push myself and keep trying. In the end, I've done a few projects with Redux, Context API and the Project that I will share with you hoping to give you a kick to try experimenting with API's and learn more😄
About the project that we are making
We will be using the ScreenShot API to create screenshots of websites with the help of the URL that we will paste to the Input field.
Under the input field when we press a button to get a screenshot we will have an image file that will output the result.
Starter files
After setting up our folder with create-react-app, we can delete the icon.svg and the app.css file. In the src folder, we will create a components folder with a file that we will name InputForm.js, in the end, everything should look like this.

Code
Starting out with our components folder and the Input.Js file we will create a simple form with a button and an input file with a name="link" that we will use to target the value of the input and implement it in the API code later this is the following code

Importing The Input and Axios to App.js
Now next step is to import The InputForm and Axios to the App.js file, with that the following code will look like this :

Axios and fetching Screenshot API
Opening the ScreenShot API website and clicking on the Documentation we will get the following list

Next stop is to import the input with the name="link" where we will target the value and import it to the URL from the API, and with that included Axios and the code

Now with console logging the Data that we get when we enter an Url we should target the screenshot as shown in the following picture

Setting up the State and getting the screenshot
Before entering any value, we have to target the screenshot value in data
and to put the state which we will set in the beginning to null
and instead of console log, we will set the state of the screenshot in the following code:

Props and Displaying the screenshot
Next step is to add props to our InputForm which will be equal to our function

And in our Input form, next stop is to add props and the onSubmit event

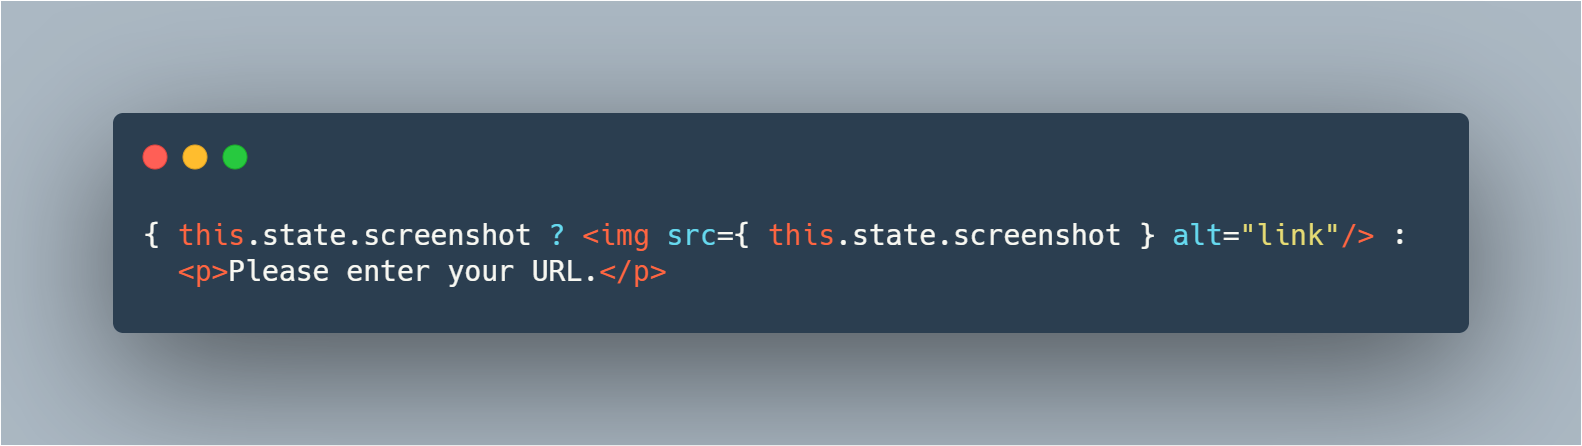
Now going under the InputForm next stop is to display the Img with an If Else statement where we call if this.state is not an empty value to display the image
which looks like this
The end
With that we finish our project, I've used my profile link from the practical dev website,
and it looks like this

I hope you had fun reading this, and if you have remarks or suggestions please let me know as I am eager to learn :D
To check the full styling, you can go to my CodeSandbox page and see the full design of the page and code.

Comments